Do you know how to schedule Instagram posts?
If not, it’s time to learn!
We know: scheduling posts on Instagram used to be a huge headache.
Thankfully, times have changed. Recent updates to the platform and a new wave of third-party apps make it easier than ever to schedule posts on Instagram.
But doing so isn’t as simple as queuing up a bunch of posts and walking away.
In this guide, we’ll cover why you should schedule Instagram posts, how to do it and best practices for automating your campaigns.
Why should you schedule Instagram posts, anyway?
Businesses have begged for scheduling features on Instagram for years.
But why are so many marketers eager to queue up their content? Below are some of the biggest benefits of scheduled Instagram posts.
1. Develop a more comprehensive content strategy
Food for thought: Instagram stats highlight that different types of content (think: carousels, images, Stories and videos) all receive different rates of engagement.
Similarly, brands need to diversify their content strategies and not just post the same type of content over and over.
When you schedule posts on Instagram, you give yourself time to actually assess your content calendar.
And when you don’t have to rush to publish Instagram posts, you have time to gather the various assets you need to create fresh, compelling content.
Want to spend a few days workshopping a storytelling post or editing a video? No problem.
2. Free up your schedule to interact more with followers
If nothing else, scheduling Instagram posts can free up some serious time in your schedule.
That means more opportunities to interact with followers and reply to comments.
Even the best Instagram scheduler can’t do the legwork of building relationships with customers. When you stick to a schedule and post consistently, you can dedicate more time to engagement.
3. Better time management means higher quality posts
Think about the effort that goes into any given post or campaign.
Writing captions. Tweaking images. Tagging.
And that doesn’t even scratch the surface.
Writing Instagram posts last-minute is a recipe for burnout. By scheduling posts on Instagram, you can batch your time appropriately and craft more meaningful posts.
4. Create seamless marketing campaigns beyond Instagram
Your marketing campaigns shouldn’t be siloed.
From organic and paid social to email and beyond, all of your channels should be on the same page in terms of creatives, landing pages and promotions. This creates a better customer experience.
Through social scheduling, you ensure that your posts fire off at the right time. If you’re using a social media management tool such as Sprout Social, you can actually sync all of your social channels (think: Instagram, Facebook and Pinterest) so you don’t have to publish manually or in real-time.
5. Encourage collaboration and brainstorming
Again, scheduling encourages brands to begin working on posts well in advance.
This means marketers and colleagues have time to hash out the best captions and creative assets.
Useful for both social teams and marketers looking for feedback from clients or influencers, collaboration and Instagram scheduling go hand in hand. Coupled with a social media approval process, it’s a cinch to get multiple sets of eyes on your content before it goes live.
“Can you schedule Instagram posts directly from the app?”
The short answer? Yes.
There are two ways to set up basic Instagram scheduling within the platform, albeit not from the mobile app itself.
The first (and perhaps most straightforward) is through Creator Studio for Instagram. Below is a quick breakdown of how it works and what desktop scheduling looks like:
The second way to schedule posts on Instagram natively is through Facebook Business Suite. Not unlike Creator Studio, the platform lets you upload your imagery, write out captions and preview your scheduled content before it goes live. A nice upside of Business Suite is that you can post via mobile.
How to schedule Instagram posts from Creator Studio
Ready to start scheduling Instagram posts? First, connect to your Instagram Business Account from your Creator Studio dashboard. Then follow these steps:
- Step 1. In Creator Studio, click Create Post, then click Instagram Feed. (If you have multiple Instagram accounts, you’ll be able to specify which one.)
- Step 2. Write your caption and include your mentions and hashtags (up to 30 each).
- Step 3. Now click Add Content and pick the images or videos you want to share. You can add images directly from your Facebook Page or upload them from your computer.
- Step 4. Tag any accounts you want to include, then click Save.
- Step 5. Now you can either click Publish to share your post immediately, or click the arrow next to Publish and select Schedule. Then choose the time and date for publication and click Schedule again.
How to schedule Instagram posts using Sprout Social
Although Creator Studio covers the basic needs of scheduling Instagram posts, there’s room for more functionality.
But with a dedicated social media publishing tool like Sprout, you can do so much more.
Cross-posting. Team collaboration and permissions. In-depth analytics. The list goes on.
We make it so easy to upload your imagery, finalize your content and schedule it. Schedule your Instagram post from Sprout.
Below is a precise, step-by-step process of how to schedule Instagram posts on Sprout.
Step 1. Pick your images or video
The first step to scheduling Instagram posts is picking the image(s) or video to post. If you’re not 100% sure what you should publish, check out our in-depth guide on Instagram post ideas.
Using Sprout’s Publishing tools you can quickly upload your Instagram image in Compose. And, you can do more than post to Instagram. The fully integrated feature lets you schedule posts to LinkedIn, Twitter, Facebook and Instagram at the same time.
Step 2. Polish your Instagram post
After you upload your Instagram picture, it’s time to edit your image. You can edit images in Compose with an integrated Image Editor tool:
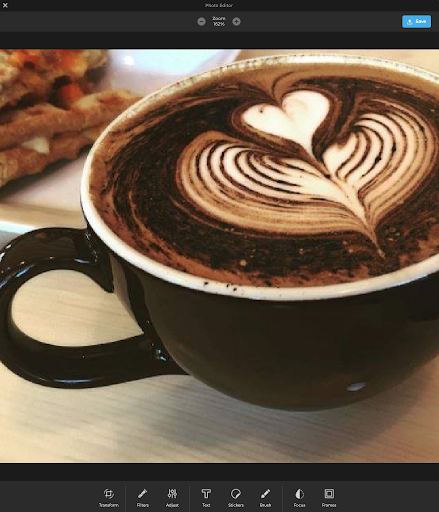
Here you can crop, add effects and overlays, change lighting and adjust the focus. Creativity counts on Instagram—avoid posting poorly edited images to your profile.
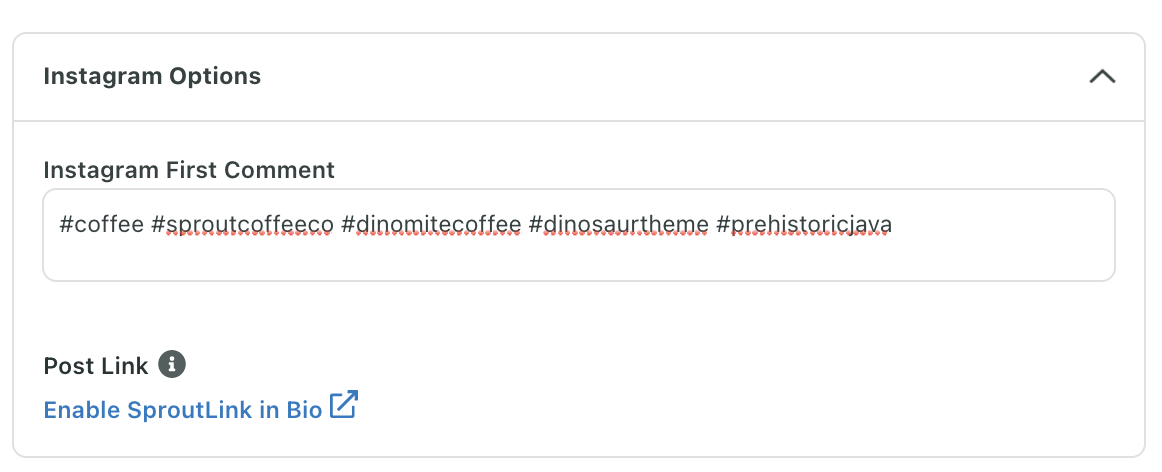
After you finish fine-tuning your image, you can tag other Instagram users directly in your photo or add hashtags to the first Instagram comment.
Users recognize and appreciate polished content. To increase your shares, likes and comments, make sure your posts go through a thorough round of edits before going live.
Step 3. Select the appropriate Instagram account (and publisher)
Once you’ve edited your content, select what account you wish to post to. Note that you can manage multiple Instagram accounts in Sprout when scheduling your content. This makes it much easier to select your preferred Instagram account along with other social networks connected to your Sprout account.
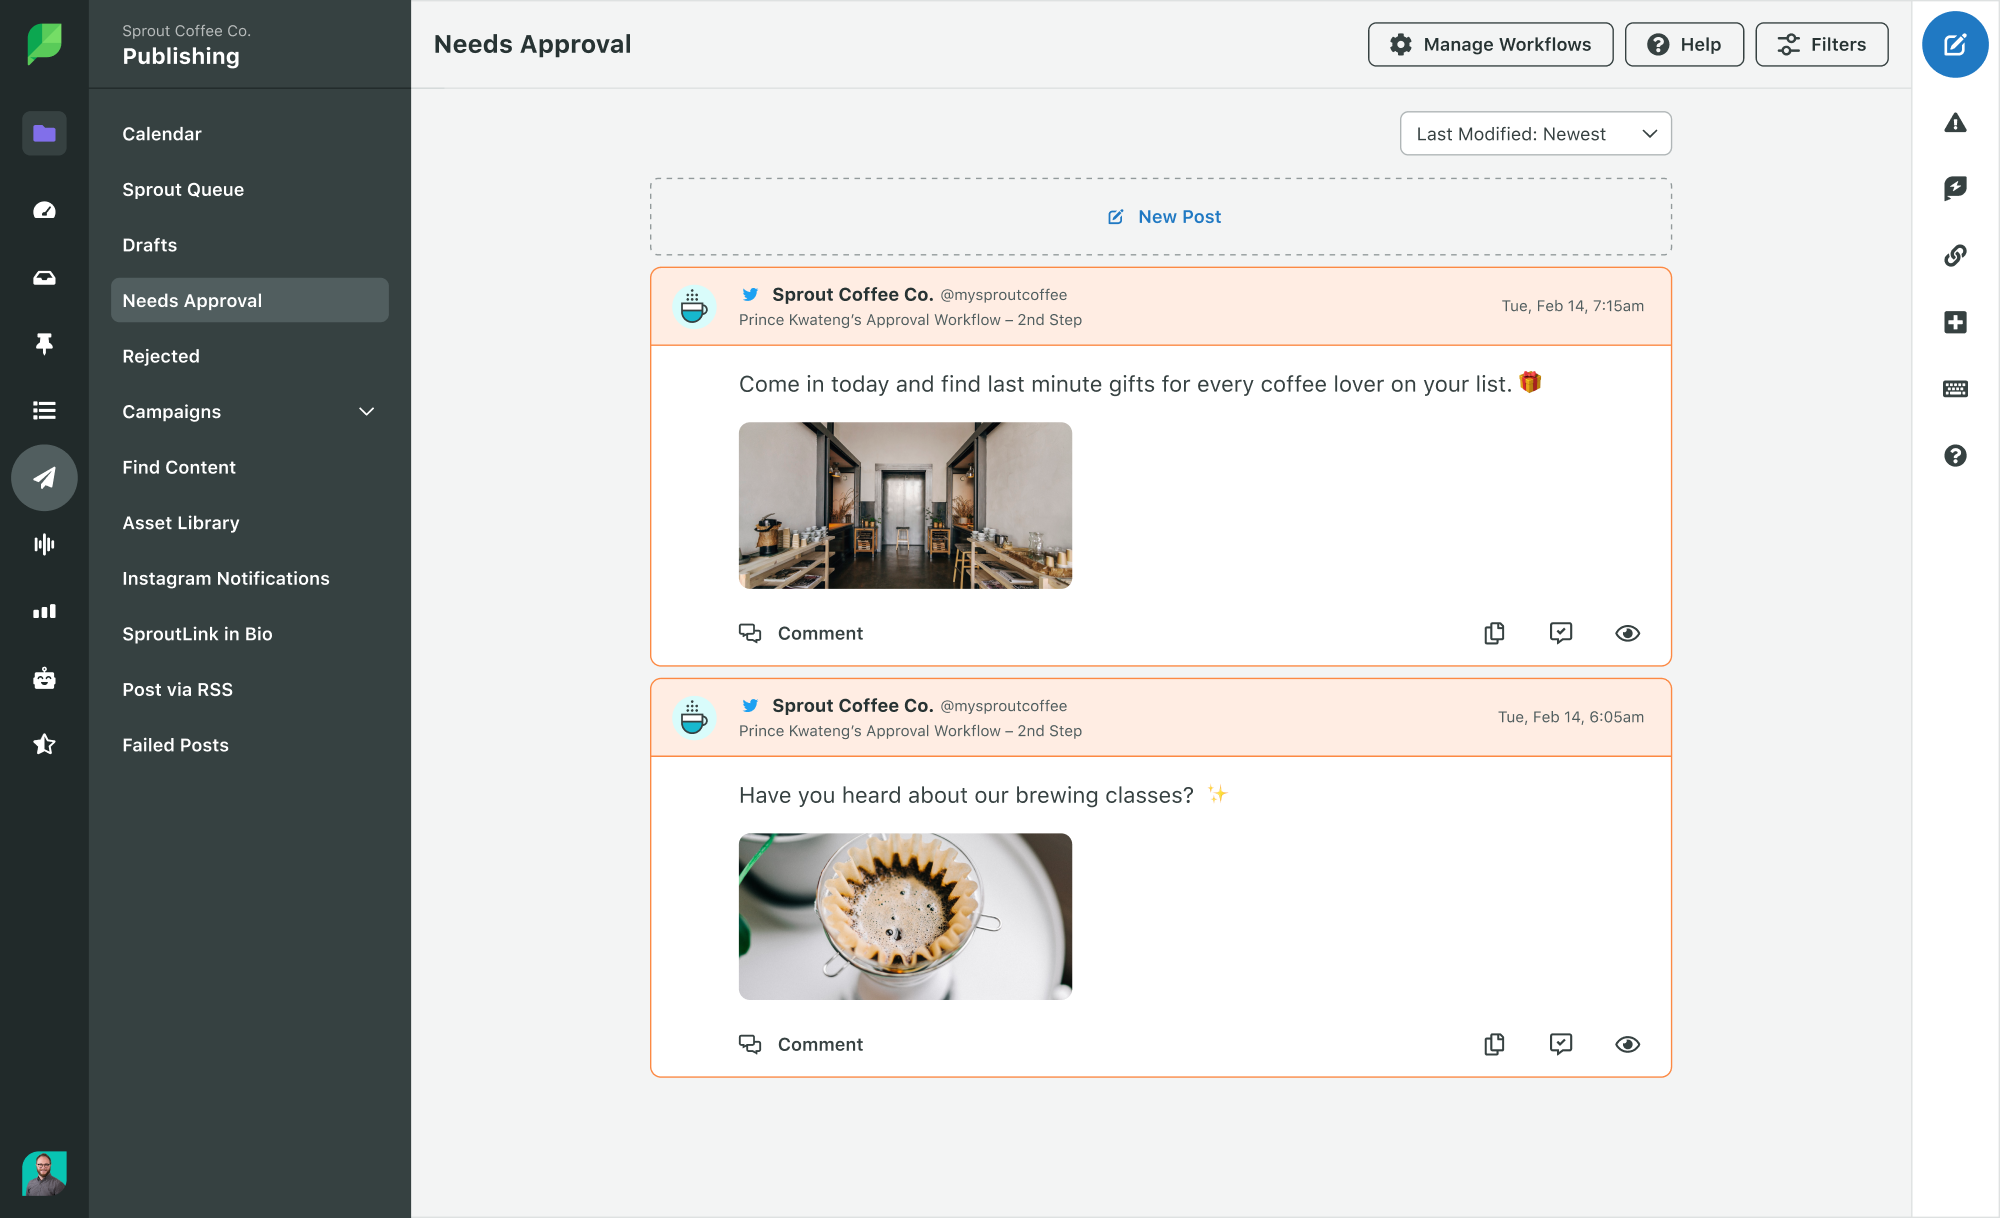
Many businesses need to publish to multiple Instagram accounts. Managing the publishing for these accounts requires the content creator to receive content approval, coordinate the post’s timing and ensure that someone is logged into the correct account to publish the post.
Luckily with Sprout, your social media team can delegate publishing duties for multiple accounts and decide who will publish the post at its scheduled time.
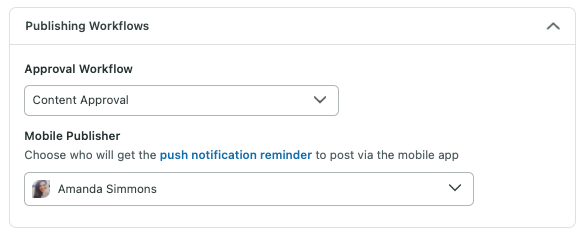
Scroll down to the Publishing Workflows section and select your mobile approval workflow and designated mobile publisher. The publisher will receive a push notification reminder when it’s time to post on Instagram.
Keep in mind, mobile publishing is only required for Story posts and Carousels. While not required for grid posts, you can select a mobile publisher if your workflow prefers it.
Step 4. Stage your post for publishing
After your content is edited and approved, you can click Send to publish it immediately, or move the post to Draft, Queue, Schedule, or Submit for Approval. Let’s take a look at each option:
- Draft: Not sure if your post is ready to go live quite yet? Want to create multiple “backup” Instagram posts for the future? Draft is a great spot to park your unfinished content or items that still need approval.
- Queue: The Sprout Queue is ideal for edited posts ready to go live—especially if you’re not sure when to post your content. When you queue your Instagram posts, Sprout picks the best time to publish within the window you specify.
- Schedule: Use the schedule feature when you want to publish your Instagram posts at a specific time. This is great for when you’re launching an Instagram contest and want the post to go live right when it starts. It’s also helpful if you’re scheduling an Instagram post as a part of a larger campaign, and need content to go out at a specific time of the day. Plan finished content for the future and see your scheduled posts in Sprout’s Publishing Calendar.
- Submit for Approval: Choosing an approver ensures your content is properly edited, grammatically correct, timely and on-brand. Select specific approvers to review your content before it goes live.
- Send: If you don’t need approval and are ready to publish right away, click Send.
Step 5. Receive your notification to post (mobile publishing workflow only)
For those scheduling or submitting an Instagram Story post or Carousel through Sprout, you’ll receive a mobile notification at the selected time or immediately after clicking Send. Because Instagram’s API doesn’t allow for other platforms to post directly to its network, Sprout developed a notification system that takes the pain out of scheduling content.
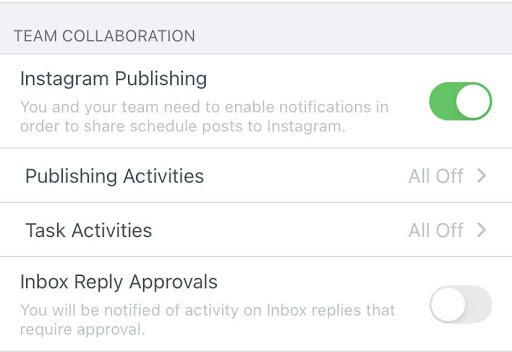
To receive these alerts, you have to select “Allow Notifications” on your mobile device. All alerts for scheduled content are sent out to the appropriate users. From the notification, you can easily open Sprout’s mobile app to send the image and caption to Instagram.
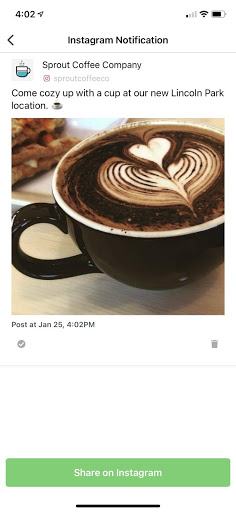
Step 6. Send your scheduled content to Instagram (mobile publishing workflow only)
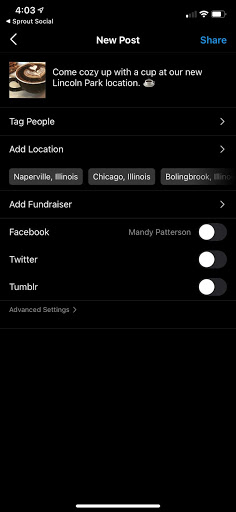
When the Instagram Publisher receives the notification to post a Story post or Carousel, they can tap on the notification to open the Sprout app. From there, they’ll see the image and description and which Instagram account the post is going to. Tapping Share on Instagram opens the Instagram app with the appropriate profile.
Then, the Instagram Publisher can paste the Instagram caption from their clipboard into the description field in Instagram, make any last-minute edits to the post and tap Share to publish.
And boom! The process of using Sprout is quick and simple for brands looking to schedule Instagram posts.
5 tips and best practices for scheduling Instagram posts
We’ll say it again: You can’t just queue up your posts months or weeks in advance and expect your Instagram to grow on autopilot.
Below are some key considerations for brands looking to leverage Instagram scheduling for the first time.
1. Optimize your post timing to maximize engagement
A nice added bonus of scheduling is that your business isn’t beholden to “business hours.”
Based on our research on best times to post on social media, there’s a correlation between time of day and engagement:
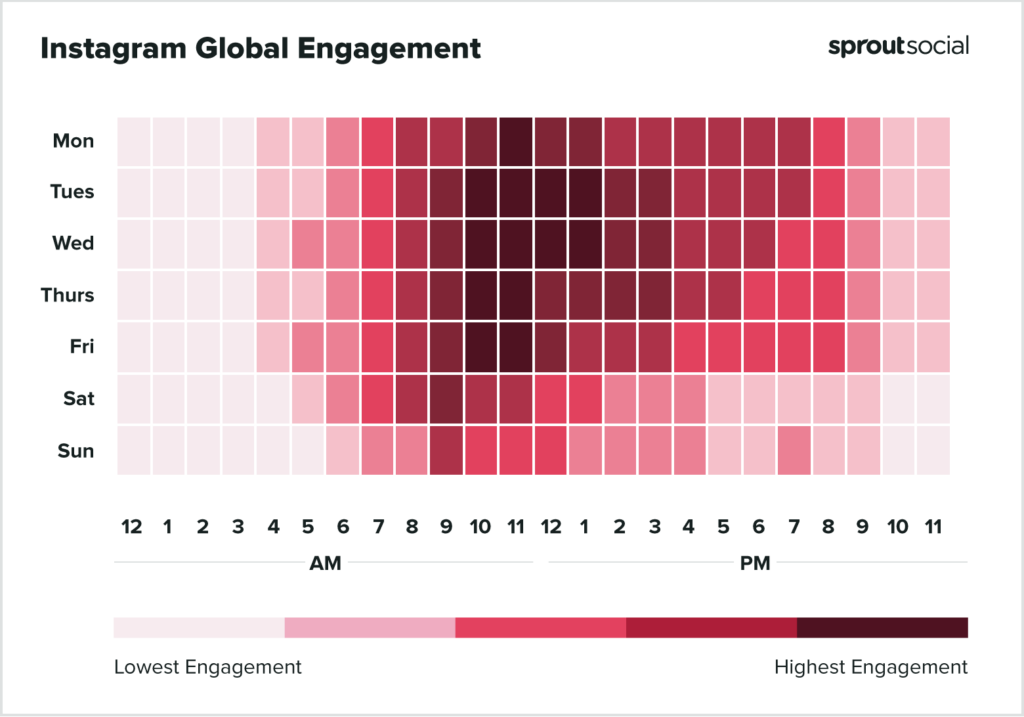
Although these numbers aren’t the be-all, end-all of follower activity and vary based on your time zone, they’re eye-opening in terms of when the average Instagram user is active:
Marketers using Sprout social as their Instagram scheduler can increase engagement with our ViralPost algorithm that optimizes post timing. Rather than guess or decide when to post via trial and error, you’ll know exactly when to post, based on real follower engagement data.

2. Take extra care when crafting your captions
It’s no secret that Instagram captions represent valuable real estate when it comes to engagement.
They shouldn’t be treated as an afterthought. For each post, consider:
- Which Instagram hashtag are you using? How many? Are they in your first comment (see below)?
- Do you need to tag any accounts?
- Did you write an appropriate call-to-action?
- How does this caption compare to your most recent one(s)?
Much like your content strategy needs to be diverse, the same rings true for your Instagram captions.
When you schedule posts in advance, you have time to put your captions under the microscope and ensure there’s some variety. Likewise, you can confirm that you’re using the right hashtags and aren’t missing any key details before your post goes live.
3. Keep a close eye on your content calendar
Piggybacking on the point above, scheduling based on a defined content calendar encourages both variety and consistency in terms of your posts.
As you queue up your posts, ask yourself:
- Are we hitting the appropriate publishing frequency (think: daily, four times a week)?
- Is there enough variation in our content schedule (think: video versus carousel versus photo)?
- How are we promoting this content to encourage engagement (think: Stories, questions in CTA)?
- Are there opportunities to cross-post this content to other networks (like Facebook)?
- Have the appropriate stakeholders reviewed this post before it goes live?
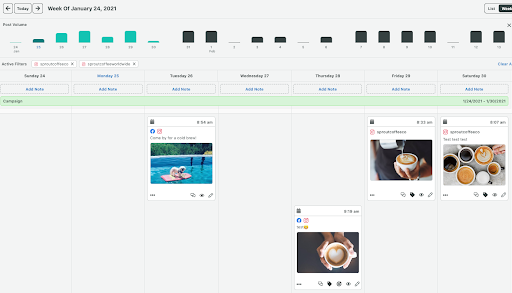
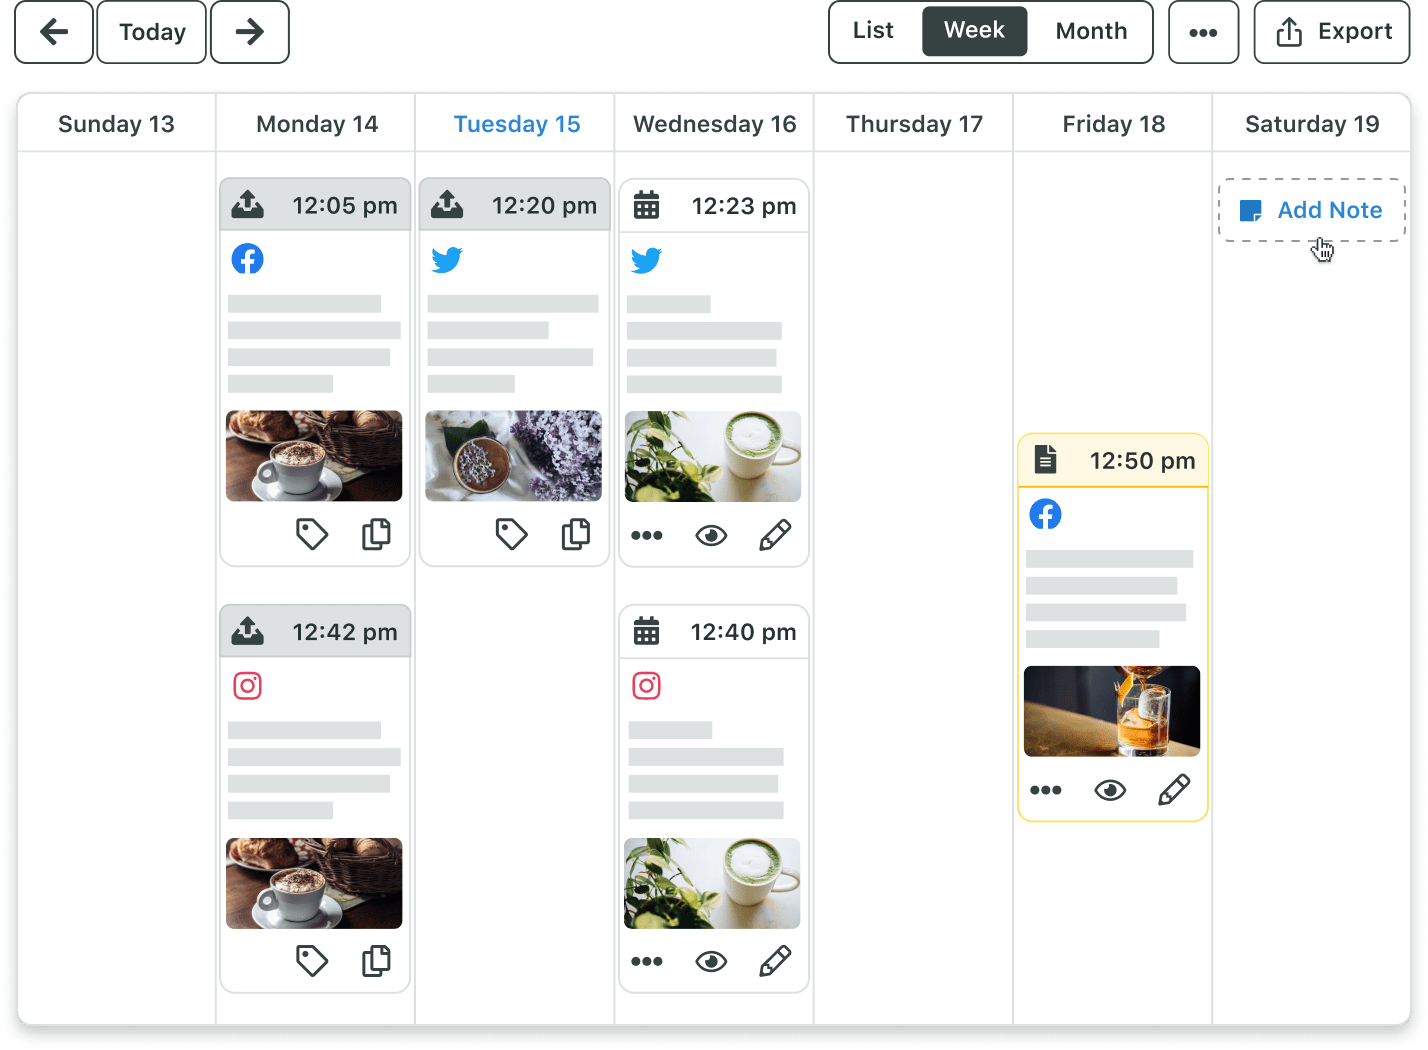
The answers to all of the above ensure more thoughtful, goal-driven posts that are poised to perform well. Below is a quick snapshot of what a content calendar looks like in the Sprout app:
4. Block off time to engage with customers
Despite popular belief, scheduling Instagram posts doesn’t make your presence more “passive.”
Quite the opposite, honestly.
Yet again, scheduling frees up your schedule to interact with customers in real-time.
Mind your notifications and make sure your comment section never gathers cobwebs. Be proactive and make a point to respond to social customers ASAP for the sake of satisfaction and loyalty.

5. Know when to hit “pause” on your scheduling
Whether due to a brand emergency or a bigger crisis management effort, sometimes you need to put a stop to your scheduled content.
Failure to do so could come off as insensitive or result in otherwise poor engagement when your followers’ minds are elsewhere. For example, publishing promotional content during certain holidays, on somber occasions or in the wake of tragedies is not the best for your brand’s reputation.
This speaks to how Instagram scheduling is so much more than putting your brand on autopilot. As a side note, Sprout has built-in features to pause scheduled posts and resume them when the time is right.
Ready to schedule posts on Instagram yourself?
If you want to build a better Instagram presence and free up more time in your busy day, you need to start scheduling.
Doing so might seem simple, but making the most of Instagram scheduling means understanding the key details of any given post and how to best engage followers.
With the tips above and tools like Sprout, you can create a compelling content calendar that does exactly that. If you haven’t already, make sure to take a trial of Sprout Social today to see our full suite of social media features in action.
The post How to schedule Instagram posts (and why you should) appeared first on Sprout Social.